Software
Now you havethat your NodeMCU is connected to your lights, you needmust toset setupup a development enviroment.environment. DirtyWatts MicroIndicator uses a tool called PlatformIO to handle uploading the C++ code to the NodeMCU.
To setup your windows/macos/linux device for development:
- Download and install Git if you don't have it already.
- Download and install Visual Studio Code (VS Code) if you don't have it already.
- Open VS Code and install the PlatformIO extension.
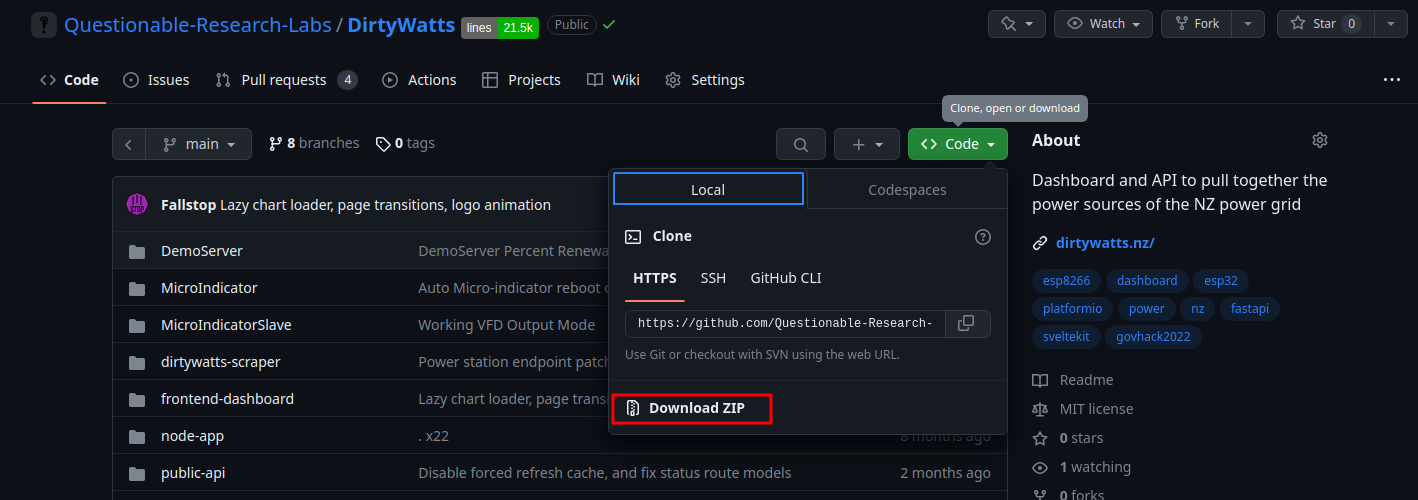
- Download and extract the DirtyWatts codebase from Questionable-Research-Labs/DirtyWatts.
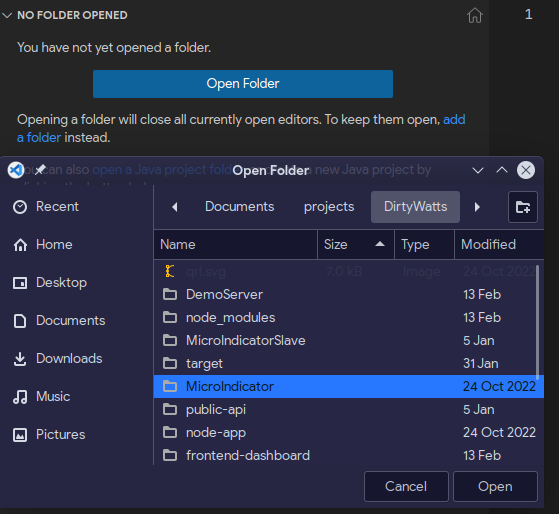
- Open the DirtyWatts/MicroIndicator folder:


You are now ready to start making changes!
Make changes to fit your device
In src/config.h file, there isare some configuration options you might need to change:
#pragma once


#ifdef OUTPUT_NEOPIXEL
    #define NeoPixelPin D1 // D1 on esp8266
    #define NeoPixelCount 30
#endif

#define APIRequestInterval 2000	 // 20 seconds

#define ApiErrorColour 150, 150, 255  // Light Blue
In particular, if you pluggedplug your lights into a diffrentdifferent pin than D1, then you need tomust change it here. You also need to set the number of LED'sLEDs you have connected. To set this, count every single one, and change the #define NeoPixelCount 30 to #define NeoPixelCount <numberOfLEDs>.
Here, you can also change the colorcolour shown when it can't connect to the Dirtywatts Servers and change how often it polls new data.
Upload the code
First, you want to check that PlatformIO can see the device. Plug in your NodeMCU via a microUSBmicro USB cable into your computercomputer; andif hopefullyeverything goes right, it will automatically bepick pickedit up by your computer.up.
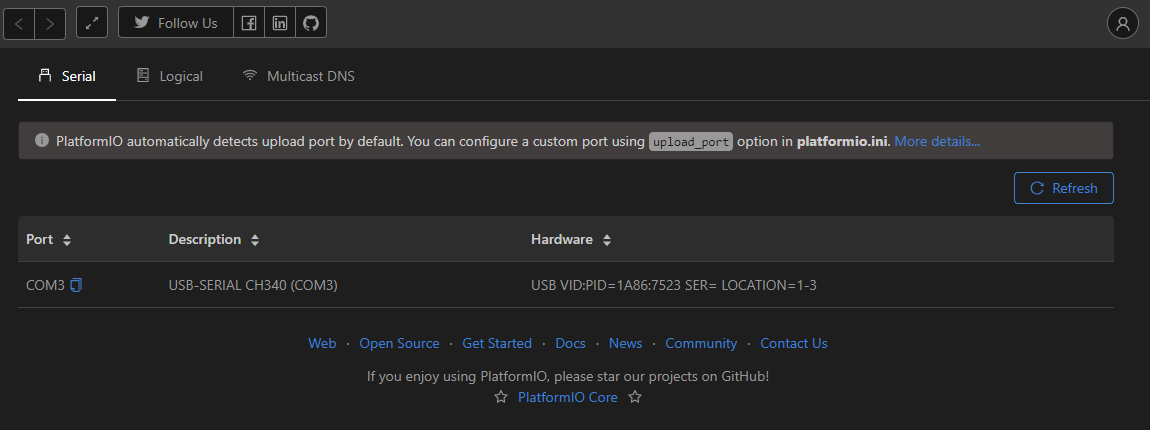
If it doesn't show here, then your NodeMCU beingis detected/recognised by your computer. FirstThe first thing to check is tryingto try a new USB cable and port,port. itIt needs to be able to carry data which quite a few of the cheap cables can't. You might need to install a driver, so check the bottom of your NodeMCU to see if it wants you to install a driver for a 'CH304g', 'CP2021', etc. As a last step, you can also try reflashingreflash the firmeware.firmware.
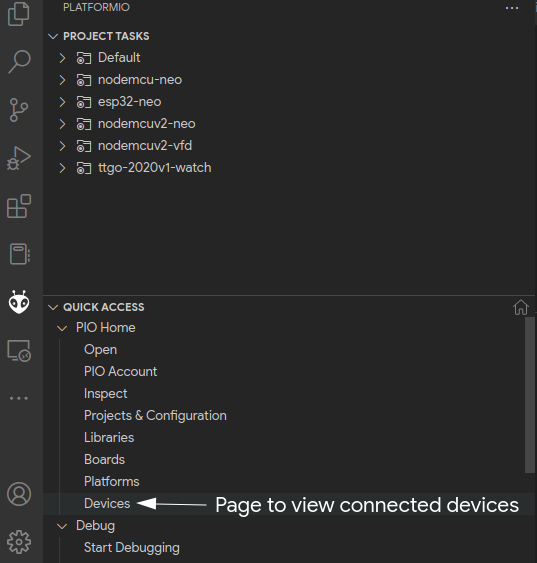
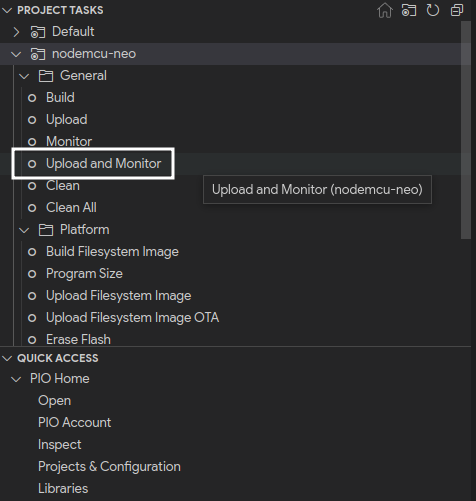
If ityour NodeMCU shows up, great! Let's upload and monitor the result using the PROJECT TASKS pannel,panel and expand the correct compile target according to the following table:
Development Board Name |
Compile Target |
| ESP8266 ESP-12 NodeMCU (v0.9) | nodemcu-neo |
| ESP8266 ESP-12E NodeMCU (v2) | nodemcuv2-neo |
| ESP8266 ESP-12E NodeMCU (v3) | nodemcuv2-neo |
| ESP32 Development Board | esp32-neo |
If youyou're are not sure,unsure, you can always try them all! It won't pernementlypermanently brick your board, but it will fail to upload with possibly weird errors.
When you are ready, run the "Upload and Monitor" tasktask; and hopefullyhopefully, it will start uploading!

Now, it'syou're onto configuring your device!